Application Models and Environments
Preparations for copying subsets
We have now prepared data masking, but there is another requirement where
qa1 and qa2 differ. While qa1 needed a copy of all the data in the
production tables, qa2 only needs a subset of the data. Only data for
employees of one of the nine departments - Customer Service - is supposed
to be copied. For this purpose, XDM provides row level processor (RLP) tasks.
In RLP tasks, you do not use selection rules to specify which tables to copy. Instead, information about the relationships between the tables must be provided through data relation rules which are stored in Application Models. Application Models also define a start table. The RLP Task itself contains a start condition that determines which rows from the start table are initially extracted. Based on the provided information, XDM automatically determines which additional tables need to be processed, and which rows from those tables need to be extracted. The process is iterative and it is possible that the same table is processed multiple times. The end result is a consistent subset of the data from multiple tables, which is then inserted into the target schema.
Data relation rules are similar — but not identical — to foreign keys in a database. Foreign keys are used to make sure that every row in a dependant table (child table) has exactly one corresponding row in a referenced table (parent table). Databases use foreign keys to prevent inserting rows into a child table for which no parent row exists, and to automatically delete rows in a child table if a parent row is deleted.
By contrast, data relation rules tell XDM - after extracting rows from a given table - which tables to process next. Data relation rules can be used to instruct XDM to visit related tables even if no formal foreign key exists in the database. In addition to forcing the extraction of parent rows, you can also use these rules to extract all child rows if a parent row is extracted (the database system does not require you to do this - a parent row without any entries in a child table is allowed).
This mechanism allows you to specify subset copies that make sense for
testers. For example, when copying a row from the table departments, the
database system does not force us to copy any additional rows from other
tables because the table departments is not a child table of any other
table. However, copying only the entry in the table departments does not
make sense for testers because it would result in a department without any
employees. Using data relation rules, you can instruct XDM to process the
table dept_emp after extracting rows from the table departments and extract
all entries for the selected department, and then to process the table
employees and extract all corresponding employee records. The remaining
tables can be processed in a similar way.
About Application Models and versions
To manage data relation rules, XDM uses Application Models. An Application Model has one or more associated versions. The different Application Model versions represent different versions of an Application that is used in an organization. For example, version 2 of a production Application may have introduced new tables when compared with version 1 of the same application. You can create one Application Model with two versions called V1 and V2, and V2 would contain additional rules that reflect the newly added tables and how they are connected to the tables that already existed in V1.
A version contains information about the start table. This table is the
first table that an RLP process will access. The data relation rules,
which are also associated with the version, tell XDM which tables to
process next. In this example, the start table will be the table
departments because we want the user to be able to specify the desired
department name, and XDM is supposed to copy information about all the
employees that work in this department. The two tables dept_manager and
dept_emp are child tables of the table departments. After extracting
the desired row from the departments table, we want XDM to access these two
tables and extract all rows that refer to the chosen department. We need
to add two data relation rules to convey this information to XDM. We then
need to add additional data relation rules so that processing does not
stop after data has been extracted from the tables departments, dept_emp
and dept_manager, but rather continue with the remaining three tables
in the schema.
Both Application Models and the individual versions can also have associated modification sets. When a version of an Application Model is used in an RLP Task, the modification sets from the version and the Application Model to which it belongs are merged and automatically applied. This way, data masking can be enforced whenever the Application Model is used, even if the RLP Task itself does not explicitly use any modification sets.
Application Models and their versions are generic - they are not tied to
any specific schema. Tables are only referenced by one-part names.
However, it is possible to use an existing schema to import existing
foreign keys into a version. In our sample database, all relations are
represented by real foreign keys in the database. We can import these
foreign keys as data relation rules from any of the existing schemas
(production, qa1, or qa2).
Creating the Application Model and version
-
In the left sidebar, click the menu category Data Subsets to expand the data subsets menu and select the menu item Application Models. Then click the button + Create. Enter the following information:
Name
HR Application -
Click the button Create and edit.
-
In the bottom panel select the tab Versions and click + Create. Enter the following information:
Name
V1Modeling connection
Select Sample production database from the drop-down list
Modelling schema
productionFor the modeling schema, you can either enter the schema name production, or you can click the button Pick, select the schemaproductionfrom the list of schemas, and then click the button Choose. -
Click the button Create and edit
-
Next to the field Start table name, click the button Pick. This opens a list of existing tables in the specified schema.
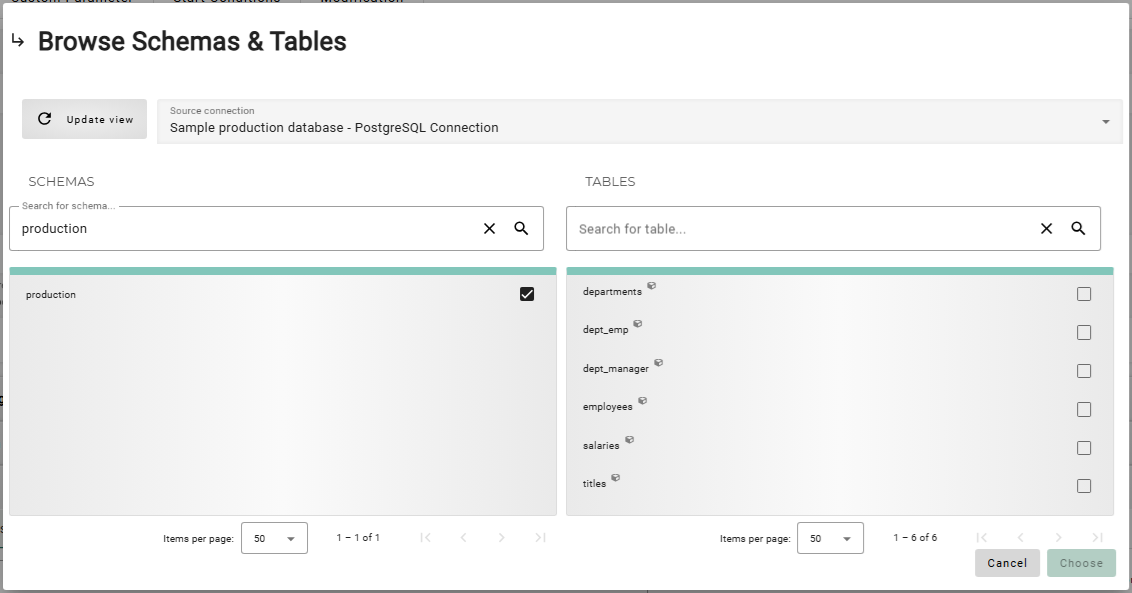
-
The list Tables will now show the six tables that exist in the schema production. Select the table
departmentsand click the button Choose. The schema browser will close and the field Start table name will be filled with the selected table name. -
Click the button Save Changes.
We can now add data relation rules to version V1 of this Application Model.
Since we selected a modeling connection and schema, XDM allows us to import
existing foreign keys. Even though these foreign keys are defined in the
schema production, the resulting data relation rules are not attached to it
in any way.
Data relation rules tell XDM the order in which tables need to be processed. It is important to keep in mind that data relation rules have slightly different semantics to foreign keys.
Creating Data Relation Rules
Before we begin creating Data Relation Rules, we would like to point out that there are four different ways to accomplish this.
Choose one of the following methods to create the Data Relation Rules. Recommended method is to create data relation rules manually, which is the third option in the list below.
-
-
XDM reads from your connected database and automatically detects the keys for you.
-
-
-
Import data relation rules from a CSV file.
-
-
-
Manually create your own keys with custom names. To use this option, you need to be familiar with your database structure.
-
-
-
This hook automatically reads existing table relationships, identifies any missing data relation rules, and provides actionable recommendations for completing your Application Model.
-
| In this example, all relations are known and can be added by import or manually. If relationships between tables are unknown, the Guide Exploring and Recommending Data Relation Rules with the Table Reference Stage Hook describes how to use the Explore table references stage hook to iteratively identify data relation rules. |
Defining the source and target Environments
While defining V1 of the Application Model, we have imported foreign keys
from the real schema production in the database production. The resulting
rule set is not tied to any database or schema name. In practice, there are
typically multiple different instances of the same set of tables in
different databases and under different schema names. In XDM, you use
so-called Environments to define where these sets of tables exist.
In this example, we need to tell XDM about the schemas production (in the
database production) and qa2 (in the database testing) so that we can use
them in an RLP Task. Even though the same set of tables also exists in the
schemas qa1, these are not relevant because we populated qa1 using a TC
Task. TC tasks copy full tables based on a list of table names and do not need
to know the details about the relationships between those tables.
To create the production Environment:
-
In the left sidebar, click the menu category Data Subsets to expand the data subsets menu and select Environments. Then click + Create. Enter the following information:
Name
Production HR Environment -
Click the button Create and edit. Optionally, enter a description. Then click the button Save Changes.
-
In the bottom panel, under Installed Applications, click the button + Create on the right hand side. Enter the following information:
Description
(Optional, may be left empty)
Application Model
Select HR Application from the drop-down list
Version
Select V1 from the drop-down list
Connection
Select Sample production database from the drop-down list
Table schema
production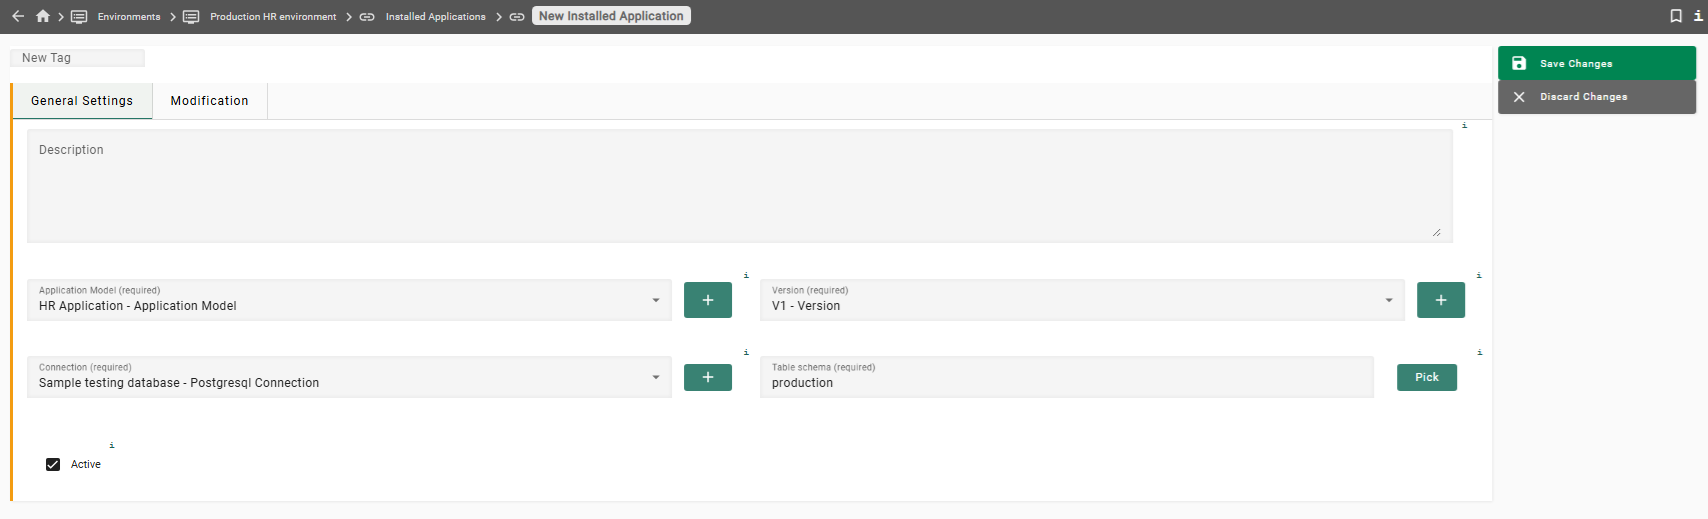
For the table schema, you can either enter the schema name production, or you can click the button Pick, select the schemaproductionfrom the list of schemas, and then click the button Choose. -
Click the button Save Changes. You will be taken to the panel Production HR Environment.
-
Verify that the field Start model is set to HR Application ( V1 ) on Sample production database. If it is not, click the button Edit, then select this value from the drop-down box, then click the button Save Changes.
To create the testing Environment:
-
In the left sidebar, click the menu category Data Subsets to expand the data subsets menu and select the menu item Environments. Then click + Create. Enter the following information:
Name
Testing HR Environment qa2 -
Click the button Create and edit. Optionally, enter a description. Then click the button Save Changes.
-
In the bottom panel, under the tab Installed Applications, click the button + Create on the right hand side. Enter the following information:
Description
(Optional, may be left empty)
Application Model
Select HR Application from the drop-down list
Version
Select V1 from the drop-down list
Connection
Select Sample testing database from the drop-down list
Table schema
qa2 -
Click the button Save Changes. You will be taken to the panel Testing HR Environment qa2.
-
Verify that the field Start model is set to HR Application ( V1 ) on Sample testing database. If it is not, click Edit, then select this value from the drop-down box, then click the button Save Changes.
Previous section: Modification Methods and Modification Sets | Next section: Row Level Processing Tasks