Complex Data Shops
Overview
In this advanced tutorial we configure a Data Shop that does more than just start a single task with a few simple parameters. Instead, it combines a workflow, the Test Data Finder and a customized Data Shop layout to support more complex test data orders.
In many projects, testers do not only want to request some contracts or one customer. They need very specific test cases that match a set of business criteria, for example:
-
all contracts of customers in a certain risk class,
-
only policies with open claims in a specific product line, or
-
customers who match a given age range, region and product combination.
Finding such cases directly in the database is difficult for non‑technical users.
In this tutorial, we build a complex Data Shop configuration that:
-
uses the Test Data Finder to pre‑select suitable business objects for a test case,
-
passes the selected identifiers to a workflow via Custom Parameter,
-
and uses that workflow to orchestrate the necessary tasks to provide the requested test data in the target environment.
The result is a Data Shop order page where testers can:
-
search for and choose suitable test case candidates using business terms, and
-
submit a single order that automatically transfers all required data according to the defined process.
For more information, visit: Data Shop.
Related Object References
The following object references are used within the Complex Data Shop configuration:
These references provide additional information on the components and configurations relevant to the Complex Data Shop setup.
Creating a Custom Parameter
To define a new parameter, follow these steps:
-
Navigate to XDM Configuration in the menu and select Custom Parameters. Click + Create to add a new parameter.
-
In the New Custom Parameter panel, fill in the required details:
Field
Value
Name
Employee IDDescription
Please enter a valid Employee IDVariable
Parameter Type
Select String from the drop-down list.
Default Value
(leave empty)
Requirement Level
Select RUNTIME from the drop-down list.
Validation Type
Select None from the drop-down list.
Validation Expression
(leave empty)
-
Click Save Changes to confirm and apply your settings.
Creating Application Models and Versions
Application Models define the data relationships and structures required for test data retrieval. Follow these steps to create one:
-
Open the Data Subsets menu and select Application Models. Click + Create and enter the following details:
Field |
Value |
Name |
|
-
Click Create.
-
Open the Application Model by clicking the button
 on the left side of the
 HR Employee. -
In the bottom panel, switch to the Versions tab and click + Create. Enter the following details:
Field |
Value |
Name |
|
Modelling Connection |
Select Sample production database from the drop-down list. |
Modelling Schema |
|
-
Click Create and edit.
-
Next, assign a start table for this model:
-
Click Pick next to Start table name. This will open a list of existing tables in the selected schema.
-
In the Tables list, select
employeesand click Choose. -
The schema browser will close, and the field Start table name will be updated accordingly.
-
-
Click Save Changes to confirm.
Adding Data Relation Rules
Now that the Application Model Version is set up, we need to define relationships between data tables:
-
Open the Table Relation Modelling panel at the bottom of the page.
-
Navigate to the Data Relation Rules tab and click Import from Database (
 ).
). -
Click Pick to view available schemas and tables.
-
In the Schemas list, select
production, then chooseemployeesfrom the Tables list and click Choose. -
A list of foreign keys will appear. Select each checkbox and click the import button (
 ).
). -
In the Data Relation Rule Import dialog, click Import to finalize the process.
Creating Another Application Model
To create a second Application Model, repeat the previous steps with the following details:
-
In the Data Subsets menu, select Application Models and click + Create. Enter:
Field |
Value |
Name |
|
-
Click Create.
-
Open the Application Model by clicking the button
on the left side of the HR Department. -
In the bottom panel, go to the Versions tab and click + Create. Enter:
Field |
Value |
Name |
|
Modelling Connection |
Select Sample production database from the drop-down list. |
Modelling Schema |
|
-
Click Create and edit.
-
Assign the start table:
-
Click Pick next to Start table name to open the schema browser.
-
Select
departmentsfrom the Tables list and click Choose. -
The selected table name will now appear in the field.
-
-
Click Save Changes to finalize.
Your Application Models and Classification Terms are now fully set up, enabling you to find relevant test data efficiently.
Adding Data Relation Rules
Now we add Data Relation Rules to the Version of this Application Model.
-
Open the panel Table Relation Modelling at the bottom of the page.
-
Then select the tab Data Relation Rules and click Import from Database (
). -
Click the button Pick to open the list of available schemas and tables.
-
In the list Schemas, select
production. In the list Tables, selectdepartments. Click the button Choose. The schema browser will disappear and you will see a list of foreign keys. -
Select the check box in front of the foreign key with the name
p.production.dept_manager.dept_manager_dept_no_fkeyand click the import button (). In the dialog window Data
Relation Rule Import, click the button Import to confirm. -
Click the Import from Database (
) Button again. -
Click the button Pick to open the list of available schemas and tables.
-
In the list Schemas, select
production. In the list Tables, selectdept_manager. Click the button Choose. The schema browser will disappear and you will see a list of foreign keys. -
Select the check box in front of the foreign key with the name
c.production.dept_manager.dept_manager_emp_no_fkeyand click the import button (). In the dialog window Data
Relation Rule Import, click the button Import to confirm. -
Click the Import from Database (
) Button again. -
Click the button Pick to open the list of available schemas and tables.
-
In the list Schemas, select
production. In the list Tables, selectdept_emp. Click the button Choose. The schema browser will disappear and you will see a list of foreign keys. -
Select the check box in front of the foreign key with the name
c.production.dept_emp.dept_emp_dept_no_fkeyand click the import button (). In the dialog window Data
Relation Rule Import, click the button Import to confirm.
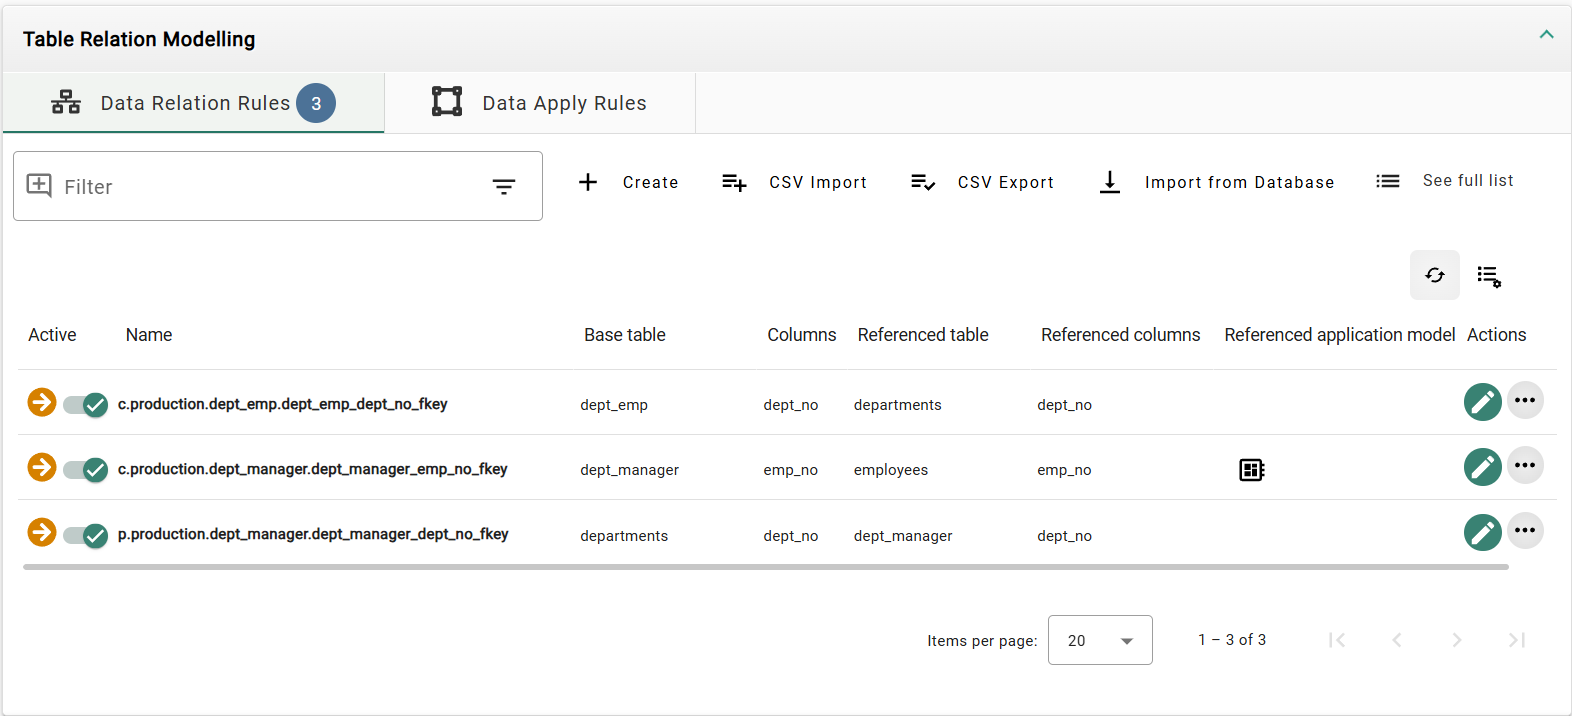
Editing Data Relation Rules
Now we need to edit one of the Data Relation Rules so it uses the Referenced Application Model.
-
Locate the
c.production.dept_manager.dept_manager_emp_no_fkeyData Relation Rule and click the edit button ( ) that is located next to it.
 -
In the top panel, select the tab Referenced table and activate the slide toggle next to the Referenced Application Model field.
-
In the Referenced Application Model field select the HR Employee Application Model.
-
Click the button Save Changes.
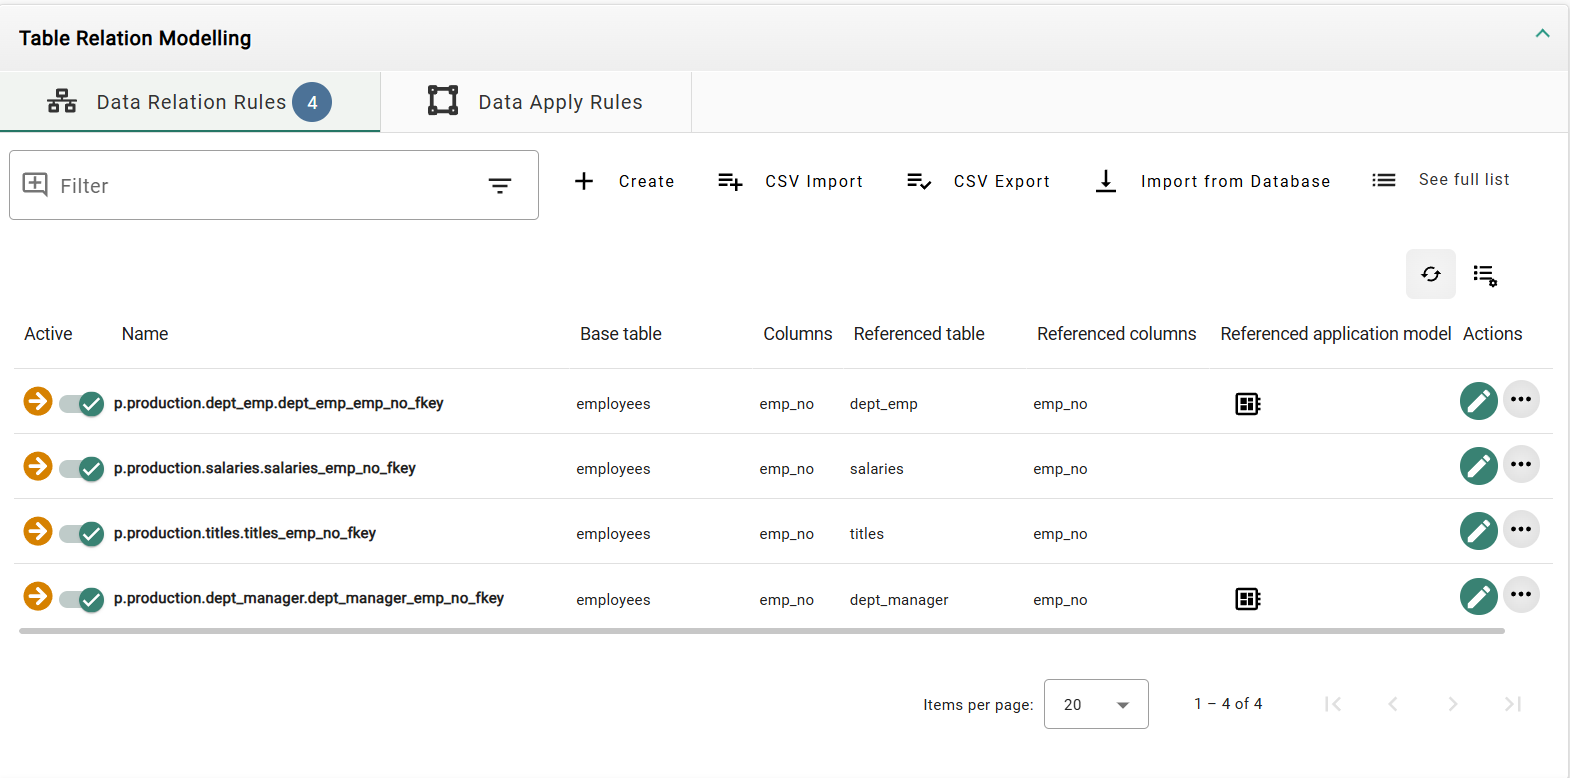
Updating Data Relation Rules
We need to change two Data Relation Rules in the other Application Model too.
-
In the left sidebar, click the menu category Data Subsets to expand the data subsets menu and select the menu item Application Models.
-
Open the Application Model by clicking the button
on the left side of the HR Employee -
Open the
V1Version by clicking the button on the left side and locate the p.production.dept_emp.dept_emp_emp_no_fkeyData Relation Rule and click the edit button () that is located next to it. -
In the top panel, select the tab Referenced table and activate the slide toggle next to the Referenced Application Model field.
-
In the Referenced Application Model field select the HR Department Application Model.
-
Click the button Save Changes.
-
Navigate through the breadcrumbs back to the Data Relation Rules from the
V1Version. -
Locate the
p.production.dept_manager.dept_manager_emp_no_fkeyData Relation Rule and click the edit button () that is located next to it. -
In the top panel, select the tab Referenced table and activate the slide toggle next to the Referenced Application Model field.
-
In the Referenced Application Model field select the HR Department Application Model.
-
Click the button Save Changes.
Creating Environments
Setting up the HR Production Environment
-
In the left sidebar, click the menu category Data Subsets to expand the data subsets menu and select Environments. Then click + Create. Enter the following information:
Field
Value
Name
HR Production -
Click the button Create.
-
Open the Environment by clicking the button
on the left side of the HR Production. -
Then select the tab Installed Applications and click the button + Create. Enter the following information:
Field
Value
Application Model
HR EmployeeVersion
V1Connection
Sample production databaseTable schema
production -
Click the button Save Changes.
-
Click the button + Create again and enter the following information:
Field
Value
Application Model
HR DepartmentVersion
V1Connection
Sample production databaseTable schema
production -
Click the button Save Changes.
-
Click the button Edit for the current Environment.
-
In the panel Start Model, check if
HR Employee ( V1 ) on Sample production databaseis selected as the Start Model. If not, select it. -
Click the button Save Changes.
Setting up the HR Testing Environment
-
In the left sidebar, click the menu category Data Subsets to expand the data subsets menu and select Environments. Then click + Create. Enter the following information:
Field
Value
Name
HR Testing -
Click the button Create.
-
Open the Environment by clicking the button
on the left side of the HR Testing. -
Then select the tab Installed Applications and click the button + Create. Enter the following information:
Field
Value
Application Model
HR EmployeeVersion
V1Connection
Sample testing database as super userTable schema
qa3 -
Click the button Save Changes.
-
Click the button + Create again and enter the following information:
Field
Value
Application Model
HR DepartmentVersion
V1Connection
Sample testing database as super userTable schema
qa3 -
Click the button Save Changes.
-
Click the button Edit for the current Environment.
-
In the panel Start Model, check if
HR Employee ( V1 ) on Sample testing database as super useris selected as the Start Model. If not, select it. -
Click the button Save Changes.
Creating the Row Level Processor Task Template
-
In the left sidebar, click the menu category Tasks to expand the tasks menu. Then click the menu item Task Templates.
-
In the tab Row Level Processing, click the button
on the left side of Row Level Processor Task Templates to expand the list. Initially, the list may be empty. -
Click the button + Create. A panel titled Create Row Level Processor Task Template opens. Enter the following information:
Field
Value
Name
Copy employee by id -
Click the button Create and edit.
-
Under the panel Source/Target Environments, click Source environment and select
HR Productionand for Target environment selectHR Testingfrom the drop-down box. -
In the top panel, select the tab Custom Parameter, click the button Configure Custom Parameters and then select the Custom Parameter
Employee ID. -
Click the button Apply.
-
In the top panel, select the tab Start Conditions and enter the following Start Condition Script:
SELECT ${uniqueRowIdentifier} FROM "${startTableSchema}"."${startTableName}" "T" WHERE "emp_no" in (${employee}) -
Click the button Save Changes.
Creating a Data Shop
-
In the left sidebar, click the menu category Tasks to expand the tasks menu and select the menu item Data Shops.
-
Click the button + Create. You will see a panel titled Create Data Shop. Enter the following information:
Field
Value
Name
Copy employee by id -
Click the button Create and edit.
-
In the top panel, select the tab Template Settings and enter the following information:
Field
Value
Executable type
Select Task Template from the drop-down list
Task Template
Select Copy employee by id from the drop-down list
In the subsection Parameters, click the button + to add a parameter. You can create a list of parameters by adding more.
-
Enter the following information:
Field
Value
Display Name
Employee IDDescription
(Optional, may be left empty)
Mapped Property
Select Employee ID from the drop-down list
-
Click the button Save Changes.
Previous section: Task Stage Hooks | Next section: Configuration of a Test Data Finder