Infrastructure Objects
Before XDM Tasks can be created, certain infrastructure objects must exist. These infrastructure objects describe which usernames are used when connecting to the different databases that are involved, file system paths that XDM can use to store temporary data, and the details for the JDBC Connections themselves.
Every task type requires a Connection object for its source and target database. The main setting for a Connection object is the JDBC URL under which a database can be accessed. Every Connection needs to have associated Credentials. Typically, a Credential object is a combination of a username and password, but it can also be a username and a certificate.
If, for executing different types of tasks, you need to connect to the same JDBC URL with different Credentials, you must create multiple Connection objects that use the same JDBC URL, but refer to a different Credential object. In this tutorial, we use three Connections, two of which refer to the same JDBC URL but use different Credentials.
In addition to a JDBC URL and a Credential object, the Connection object can also have an associated Storage Location. A Storage Location represents a directory on the same server where a database is running, and a file transfer mechanism (such as FTP or SFTP) that XDM can use to copy data from or to this directory. Storage Locations also need to have associated Credentials so that XDM can log on to the server using the selected file transfer mechanism. For any given database server, the Credentials for accessing the database itself and the Credentials for FTP access to the Storage Location’s directory on that server are not necessarily identical. Therefore, you may have to create two Credential objects for the same server.
The directory of a Storage Location is used for bulk data movement operations, which typically operate as server-side processes that can only work with local directories. Examples for this are: The Oracle data pump, the EXPORT command in Db2 for LUW, the UNLOAD utility in Db2 for z/OS, or the COPY command in PostgreSQL. All these facilities directly read from or write to local files on the server.
In XDM, a Table Copy Task that copies between databases of the same type (e.g., from PostgreSQL to PostgreSQL) works by invoking bulk data movement mechanisms of the source and target database. If the source and target databases are on two different servers, XDM will transfer the extracted data from the source database server’s Storage Location to the target database server’s Storage Location using the specified file transfer mechanism.
By contrast, an XDM Row Level Processor Task works by reading and writing all
data through the JDBC Connection (using SELECT and INSERT statements).
Therefore, to run a Table Copy Task, the source and target Connections need
to have associated Storage Locations, but Row Level Processor tasks do not.
Since we are going to run both types of tasks in this tutorial, we need to
have Storage Locations associated with the source and target Connection.
The order in which we need to create these infrastructure objects is as follows:
-
Create Credentials
-
Create Storage Locations (which use Credentials)
-
Create database Connections (which use Storage Locations, and have separate Credentials)
Creating Credentials
There are two user accounts in the sample PostgreSQL instance. You must create two Credential objects in XDM that correspond to these two user accounts. In addition, you need to create a Credential object that represents the PostgreSQL super user. This super user account is necessary because in PostgreSQL, only the super user can temporarily disable triggers, which is required to execute a Table Copy Task.
You also need to create a Credential object for accessing the sample SSH server.
-
In the left sidebar, click the menu category Infrastructure to expand the menu. Then click the menu item Credentials.
-
Click the button + Create. This opens a dialog window. Enter the following information into the fields:
Name
Production user (read-only) on sample databaseUser
prodroPassword
pass456prod -
Click the button Create. The first new object will be inserted in the list of Credentials.
-
Click the button + Create again. The dialog window is shown again. Enter the following information:
Name
QA user on sample databaseUser
qaPassword
pass789qa -
Click the button Create. The second new Credential object will be inserted in the list of Credentials.
-
Click the button + Create again. The dialog window is shown again. Enter the following information:
Name
Super user on sample databaseUser
postgresPassword
pass123postgres -
Click the button Create. The third new Credential object will be inserted in the list of Credentials.
-
Click the button + Create again. The dialog window is shown again. Enter the following information:
Name
SSH user on sample serverUser
sshuserPassword
pass123ssh -
Click the button Create. The fourth new Credential object will be inserted in the list of Credentials.
In addition to authenticating database access using a username and password, XDM can also use a certificate. In order to use certificate-based authentication, you must create a Credential object, then edit it and activate the setting Certificate based authentication. However, for this tutorial, certificate-based authentication is not used.
Creating Storage Locations
Some task types require a file system path where extracted data can be stored.
This file system path must be local to the database server. In XDM, Storage
Locations are associated with a database Connection, i.e., when XDM extracts
data from tables in any given database Connection, it will store the resulting
files under the Storage Location that is associated with that database
Connection. Since the sample databases production and testing are located on
the same PostgreSQL server, you can use the same Storage Location for both.
-
In the left sidebar, click the menu category Infrastructure to expand the menu. Then click the menu item Storage Locations.
-
Click the button + Create. This opens a dialog window. Enter the following information into the fields:
Name
Directory /xdmdata on PostgreSQL serverAddress
sample-sshWorking directory
/xdmdataCredential
Select SSH user on sample server from the drop-down list
-
Click the button Create and edit. This will create the Storage Location object in XDM and open it in edit mode. Make sure that the following fields are set as shown:
Platform
Aix/Unix/LinuxFile transfer protocol
Secure File transfer (SFTP)Port
2222FTP root directory
(leave empty)
-
Click the button Save Changes.
Configuring database Connections
The sample PostgreSQL instance contains two databases. In XDM, a Connection
object represents a combination of a database location (in the form of a JDBC
URL) and a Credential object. We need one Connection to the database production
with the username prodro, one Connection to the database testing with the
username qa, and one Connection to the database testing with the
username postgres.
To create the first Connection object:
-
In the left sidebar, click the menu category Infrastructure to expand the menu. Then click the menu item Connections. Click the button
 on the left side of PostgreSQL Connections to open the list of existing
PostgreSQL Connections.
on the left side of PostgreSQL Connections to open the list of existing
PostgreSQL Connections.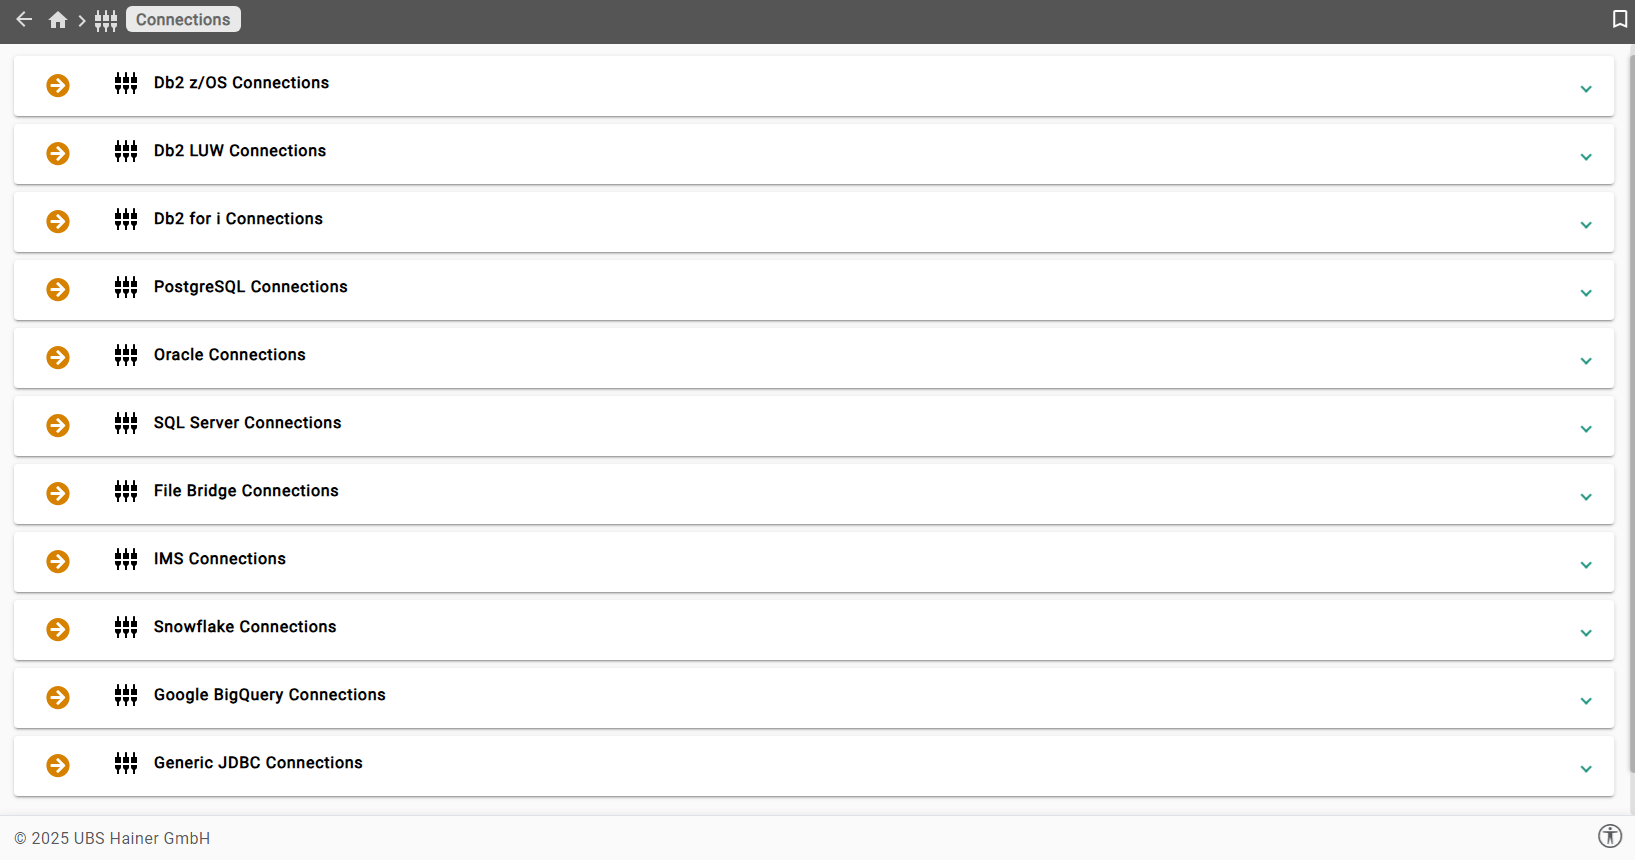
-
Click the button + Create. This opens a dialog window. Enter the following information:
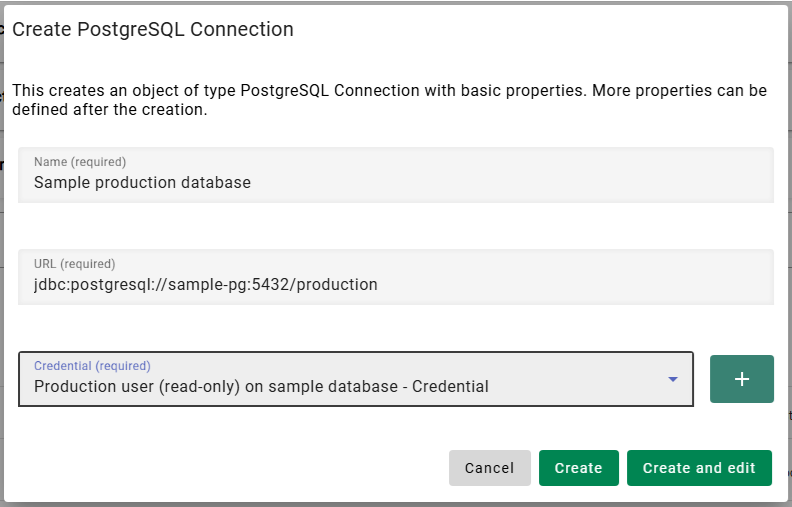
Name
Sample production databaseURL
jdbc:postgresql://sample-pg:5432/productionCredential
Select Production user (read-only) on sample database from the drop-down list
-
Click the button Create and edit. This will create the Connection object in XDM and open it in edit mode.
-
In the field Storage location, select Directory /xdmdata on PostgreSQL server from the drop-down box. Then click the button Save changes. The first Connection object is now fully defined.
To create the second Connection object:
-
Use the breadcrumbs in the upper panel to navigate back to the Connection panel.

or in the left sidebar, click the menu item Connections. Click the button ![]() on the left side of PostgreSQL Connections
to open the list of existing PostgreSQL Connections. You should see the
first Connection in this list.
on the left side of PostgreSQL Connections
to open the list of existing PostgreSQL Connections. You should see the
first Connection in this list.
-
Click the button + Create. The dialog window is shown again. Enter the following information:
Name
Sample testing databaseURL
jdbc:postgresql://sample-pg:5432/testingCredential
Select QA user on sample database from the drop-down list
-
Click the button Create and edit. This will create the Connection object in XDM and open it in edit mode.
-
In the field Storage location, select Directory /xdmdata on PostgreSQL server from the drop-down box. Then click the button Save changes. The second Connection object is now fully defined.
To create the third Connection object:
-
Use the breadcrumbs in the head bar to navigate back to the Connection panel
-
Click the button + Create. The dialog window is shown again. Enter the following information:
Name
Sample testing database as super userURL
jdbc:postgresql://sample-pg:5432/testingCredential
Select Super user on sample database from the drop down list
-
Click the button Create and edit. This will create the Connection object in XDM and open it in edit mode.
-
In the field Storage location, select Directory /xdmdata on PostgreSQL server from the drop-down box. Then click the button Save changes. The third Connection object is now fully defined.
This concludes the preliminary work. You are now ready to create XDM tasks.
Previous section: Sample Environment | Next section: Native Table Copy Tasks